Ally Ring
PicoCTF 2023 - Forensics//Invisible WORDs Writeup
March 2023
I recently partook in PicoCTF 2023, and due to a number of technical issues with the platform, I ended up completing a lot of forensics challenges. One of these challenges was a stegonography challenge called Invisible WORDs; by the end of the event, the challenge had 172 solves, making it one of the hardest challenges of this year’s CTF.
Challenge Files, Hints and Clues
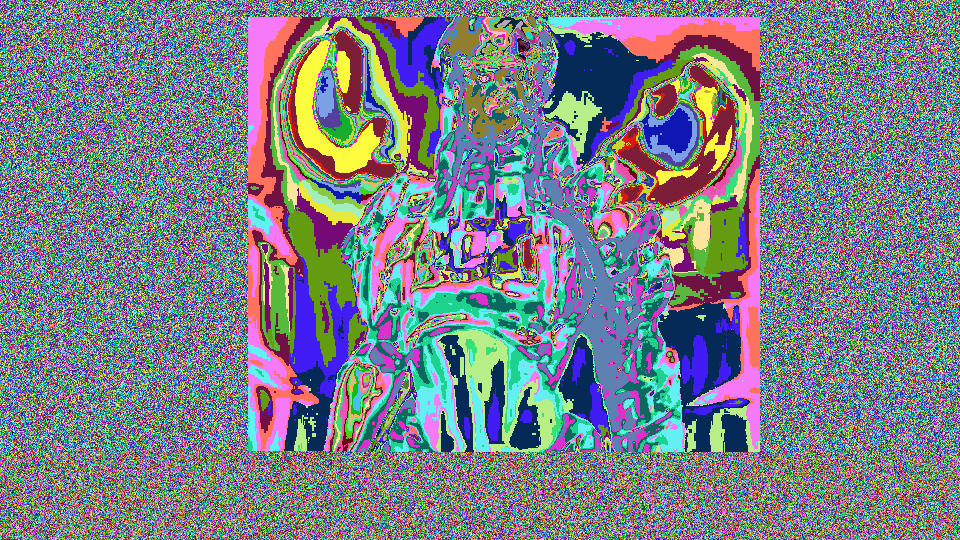
The challenge gives only one file, an “AI generated” bitmap image of a character against a background of seemingly random noise.

Additionally, the challenge gives 2 hints:
Something doesn’t quite add up with this image…
How’s the image quality?
These hints don’t seem very helpful at first. However, the title of the challenge - Invisible WORDs - gives a hint as to what data I needed to look for.
Words..?
A “word” in computer science, according to Wikipedia, is
…The natural unit of data used by a particular processor design…
Words can vary in length, but are typically kept at 2 bytes long (16 bits) with other variants, such as “D(ouble)WORDs” and “Q(uad)WORDs” being longer in length. As such, I guessed that I would be looking for 2 byte combinations of data within the image, where the order of the bytes would be important.
Dissecting the image for leads
I started out by taking a look for any information about the image that could lead to discovering hidden data.
Initially, I looked at the metadata using exiftool, which unfortunately uncovered no new information.
I then ran the strings command on the image, and again found no helpful data.
I then began to look at the image data using CyberChef. I used the “Randomize Colour Palette” operation to look for any abnormal patterns in the image’s noise that I may have missed, and sure enough, there was a distinct section of noise at the bottom of the image that was a different colour to the rest of the image.
I then used the “View Bit Plane” operator to inspect each colour channel to see if it was affecting the section of noise where I suspected data may have been hidden.
The red channel was set to 255 throughout the rest of the image, but changed to noise at the “data” section. The green channel was similar, except instead of 255 throughout the rest of the image, pixels were set to 0. The blue channel, however, did not have any noticable signs of hidden data.
Hey, wait a second… 2 colour channels, each with one byte of data per pixel, totalling 2 bytes per pixel, or one “word” per pixel. I think we have our lead!
Extracting the Words
Extracting the data from the image proved to be a challenge, as the bitmap seemed to store pixel data in the order BGR, rather than the typical RGB. This seemed to cause issues with PIL, the Python image processing library, which resulted in a lot of the attempts to extract the data failing.
As such, I opted to use CyberChef’s “split colour channels” operation to save each channel of the original image as a spearate file, which saved me a lot of time trying to fix PIL’s importing issues.
Once I had the channels saved as separate images, I began to write a python script to extract the data from the red and green channels. I started by writing some quick code to find the first row with data in the channel, which ended up being around row 450.
Next, I wrote a nested loop to write all of the data in the red and green channels to files in a few different formats, changing the order of red and green bytes, as well as changing the format from atlernating between each colour to dumping the entirity of a colour channel at once.
# Setting up the different output formats and input files
RED_FILE = "red.png"
GREEN_FILE = "green.png"

from PIL import Image

red = Image.open(RED_FILE)
green = Image.open(GREEN_FILE)

width, height = red.size

red_pix = red.load()
green_pix = green.load()

data_rg = b''
data_gr = b''

data_r_g = b''
data_g_r = b''
# Loops to extract the data
for y in range(450,height):
    for x in range(0, width):
        print(str(((x+(width*y))/(width*height)) * 100) + "%")

        data_rg += red_pix[x,y][0].to_bytes(1,'big') + green_pix[x,y][1].to_bytes(1,'big')
        data_gr += green_pix[x,y][1].to_bytes(1,'big') + red_pix[x,y][0].to_bytes(1,'big')
        data_r_g += red_pix[x,y][0].to_bytes(1,'big')
        data_g_r += green_pix[x,y][1].to_bytes(1,'big')


for y in range(449,height):
    for x in range(0, width):
        print(str(((x+(width*y))/(width*height)) * 100) + "%")
        data_r_g += green_pix[x,y][1].to_bytes(1,'big')
        data_g_r += red_pix[x,y][0].to_bytes(1,'big')
After some tweaking, this generated a number of files that I searched using binwalk.
One file - where the bytes were placed in an alternating “green pixel, red pixel” order - contained a single signature embedded right at the start of the extracted data:
HEXADECIMAL     DESCRIPTION
0x28A           End of Zip archive, footer length: 22
However, binwalk was unfortunately only able to find the end of the zip archive.
A partial zip archive..?
I decided to look into this lead further, and concidered why there could be an identified end, but no start. I concluded that either the signature was just an unfortunate coincidence, or that the order of bytes was somehow in a reversed order.
Concidering the second possibility, I looked again at the extracted image and took closer note of the fact that the top line of the embedded data, which contained the “end of zip archive” signature, was cut off halfway through or so.
The only way to keep that signature in order but change the order of the rest of the file would be to change the order of large chunks of data. Based on these two bits of information, I decided to try reading the file from the bottom up, rather than the top down, which would change the order of the rows and make the cut off row appear at the end of the file, which would make more sense that appearing at the start.
I modified my script to read from the bottom up, but still read bytes left to right as before:
for y in range(height-1,450-1,-1):
    for x in range(0, width):
        # Extract data here
Running the script again yielded a new file, which I inspected with binwalk:
HEXADECIMAL     DESCRIPTION
0x22            Zip archive data, compressed size: 169392, uncompressed size: 448642
0x2968A         End of Zip archive, footer length: 22
A zip file, neat!
I extracted this file using binwalk -e, which I then unzipped, revealing a text file containing the flag!
Conclusion
This was a really fun challenge, despite it’s difficulty. CyberChef definitely saved me from having to troubleshoot PIL’s strange file handling, and it’s definitely a tool I’d reccommend everyone takes advantage of, especially in a CTF scenario. Additionally, it’s always worth taking a look at the bigger picture and trying to be logical about any new information you get to see where it might fit into a challenge.